- Why Prioritizing Pool Closing Matters for Winter Protection
- Your Step-by-Step Guide to Winterizing a Pool
- Common Mistakes to Avoid When Winterizing a Pool
- DIY Pool Closing vs. Professional Service
Pool Closing is an essential annual ritual for any pool owner living in a region exposed to freezing temperatures. Far more than just putting a cover on, proper winterization is the ultimate act of protection for your swimming pool, safeguarding your investment from potential damage and ensuring a hassle-free re-opening come spring. Neglecting this crucial step can lead to costly repairs, structural damage, and a significantly more challenging start to the next swim season.
Why Prioritizing Pool Closing Matters for Winter Protection
The cold months bring unique challenges that can severely impact your pool’s longevity and performance. Freezing water expands, exerting immense pressure on pipes, pumps, filters, and even the pool walls themselves. A comprehensive pool closing protects against:
Freeze Damage: The most common and devastating issue. Water left in pipes or equipment can freeze, cracking PVC lines, filter housings, and heat exchangers.
Algae Bloom and Staining: Uncirculated, untreated water provides a perfect breeding ground for algae and other contaminants, leading to stubborn stains and a green nightmare by spring.
Structural Damage: Ice expansion can stress the pool coping, tiling, and even the pool shell, leading to cracks and delamination.
Equipment Degradation: Prolonged exposure to harsh winter conditions without proper care can corrode internal components of pumps, heaters, and chlorinators.
By diligently preparing your pool for winter, you’re not just saving money on potential repairs; you’re extending the lifespan of your entire pool system and setting yourself up for a sparkling clean start when warmer weather returns.
Your Step-by-Step Guide to Winterizing a Pool
Successfully winterizing a pool can be broken down into several manageable steps. While the specifics might vary slightly based on your pool type (in-ground vs. above-ground, saltwater vs. chlorine), the core principles remain the same.
1. Thorough Cleaning and Vacuuming: Begin by removing all debris from the pool. Skim the surface, vacuum the bottom, and brush the walls. A clean pool going into winter is less likely to develop stains or algae.
2. Balancing Water Chemistry: This is perhaps the most critical step. Test your water and adjust levels to be within the ideal range:
pH: 7.4-7.6
Alkalinity: 80-120 ppm
Calcium Hardness: 180-220 ppm
Properly balanced water prevents corrosion and scaling throughout the winter. It’s also wise to super-chlorinate the pool a few days before actual closing to kill any lingering bacteria or algae.
3. Lowering the Water Level: For most in-ground pools, drain the water level below the skimmer mouth and return jets. This prevents water from entering the plumbing system, where it could freeze. For above-ground pools, follow manufacturer instructions, which often involve lowering it below the skimmer opening or simply disconnecting hoses.
4. Draining and Blowing Out Plumbing Lines: This is the most crucial step for preventing freeze damage.
Drain Equipment: Open drain plugs on your pump, filter, heater, and any other auxiliary equipment. Store these plugs in a safe place.
Blow Out Lines: Use a powerful air compressor or a shop vac (set to blow) to force all water out of the skimmer lines, return lines, and specialty lines (cleaner, spa jets). Continue blowing until no more water or air bubbles emerge from the returns. Once clear, immediately plug the return and skimmer lines with winterizing plugs.
Add Antifreeze (Optional but Recommended): For extra protection, especially in severe climates, pour non-toxic pool antifreeze into the skimmer and return lines after they’ve been blown out.
5. Adding Winterizing Chemicals:
Winterizing Algaecide: Prevents algae growth. Choose a long-lasting formula.
Shock Treatment: Ensures any remaining contaminants are oxidized.
Stain & Scale Preventer: Protects surfaces from mineral deposits and staining.
Disperse these chemicals evenly throughout the pool water.
6. Removing and Storing Accessories: Take out ladders, diving boards, skimmer baskets, solar covers, and any other removable equipment. Clean them thoroughly and store them in a dry, protected area.
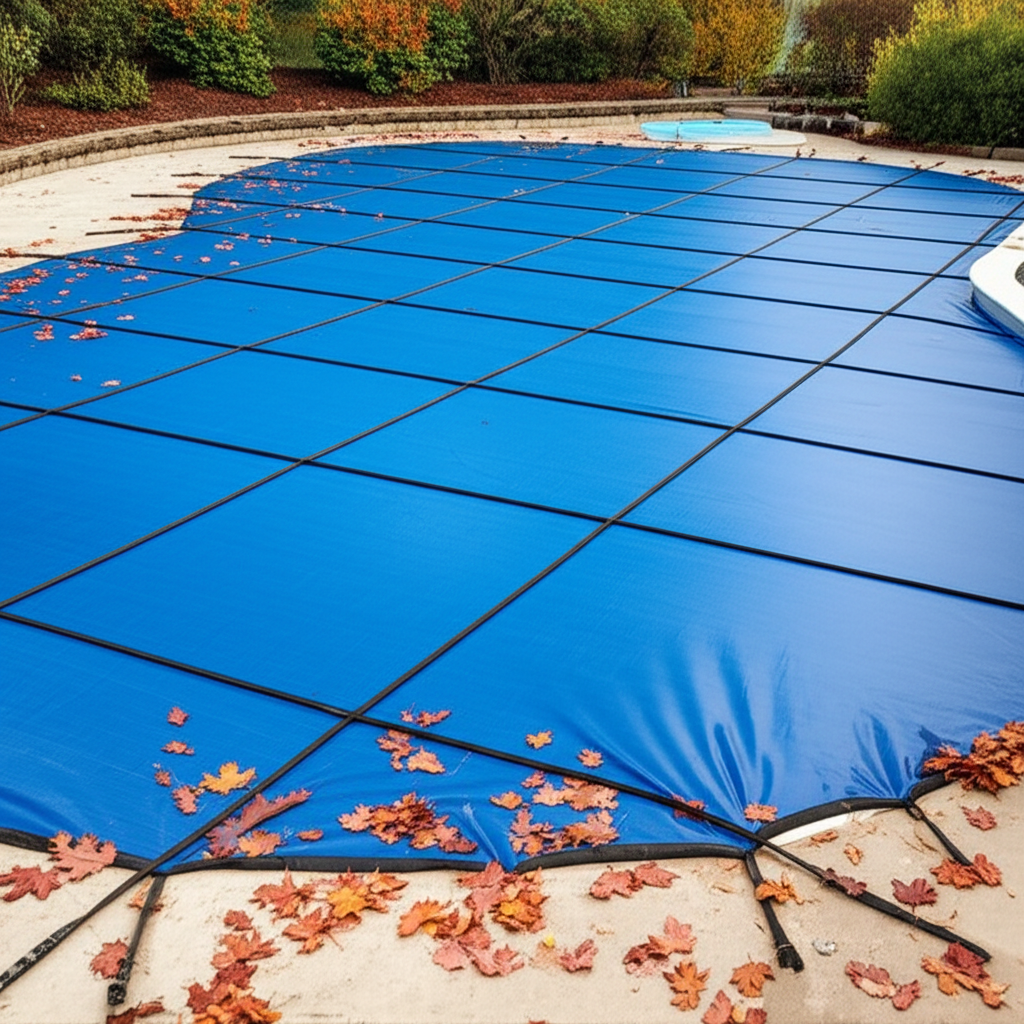
7. Installing the Pool Cover: Securely install your winter cover. Whether it’s a solid tarp and water bags or a safety cover with springs, ensure it’s taut and free of major gaps to keep debris out and prevent wind damage. For solid covers, consider a submersible pump to remove standing water and prevent sag.
Common Mistakes to Avoid When Winterizing a Pool
Making a mistake during pool closing can negate all your efforts and lead to problems in the spring. Be mindful of these common pitfalls:
Skipping Water Chemistry: Unbalanced water can cause etching, staining, or equipment corrosion even when dormant.
Incomplete Water Drainage: Even a small amount of trapped water in a pipe can freeze, expand, and crack the entire line.
Neglecting the Filter: Ensure your filter tank is drained completely and thoroughly cleaned. For DE and cartridge filters, remove the grids/cartridges, clean them, and store them dry. Sand filters should be backwashed, then drained.
Using the Wrong Cover: A poorly fitting or damaged cover won’t protect your pool from debris or freezing rain.
Assuming Warm Weather Will Last: Start your closing process well before the first predicted frost. It’s better to be early than sorry.
Not Labeling: If you disconnect multiple pipes or pieces, label them clearly to make spring re-opening easier.
DIY Pool Closing vs. Professional Service
Deciding whether to DIY your pool closing or hire a professional depends on your experience, comfort level, and the complexity of your pool system.
DIY Pool Closing: Can save money and provide a sense of accomplishment. It requires careful attention to detail, the right tools (air compressor, test kit), and a willingness to learn. It’s often suitable for above-ground pools or simpler in-ground setups.
* Professional Pool Closing: Offers peace of mind and ensures all steps are completed correctly, especially for complex systems with heaters, spas, or intricate plumbing. Professionals have specialized tools and expertise, and often guarantee their work, protecting you from potential issues. While it costs more upfront, it can be a wise investment to prevent costly damage.
In conclusion, a meticulous pool closing is not merely a task; it’s a critical investment in your pool’s future. By following these steps and avoiding common mistakes, you’ll ensure your pool weathers the winter months unscathed, ready to welcome you back to crystal-clear waters and endless enjoyment the moment spring arrives.