- The Hidden Costs of Ignoring Pool Leaks
- Detecting a Leak in Your Vinyl Liner
- Choosing the Right Vinyl Liner Patch Kit
- Step-by-Step: Applying Your Vinyl Liner Patch
- Tips for a Durable Pool Leak Repair
- Conclusion
Vinyl Liner Patch: The Ultimate Easy Pool Leak Repair
Vinyl liner patch kits offer an accessible and highly effective solution for maintaining the integrity of your swimming pool. Discovering a leak in your vinyl liner can be a frustrating experience, leading to wasted water, imbalanced chemicals, and even potential damage to your pool’s structure or surrounding property if left unaddressed. Fortunately, many small to medium-sized tears or punctures can be repaired quickly and efficiently by any homeowner with the right tools and a little patience, preventing minor issues from escalating into major expenses.
The Hidden Costs of Ignoring Pool Leaks
A seemingly small leak might not appear to be an urgent problem, but its long-term impact can be significant. Beyond the constant need to top up your pool, which translates directly to higher water bills, a persistent leak disrupts the careful chemical balance of your pool water. Essential sanitizers and pH stabilizers are diluted and lost, leading to algae growth, cloudy water, and a less enjoyable swimming environment. Furthermore, water escaping from the liner can erode the ground beneath the pool, compromising the structural integrity of your pool walls and deck over time. Early detection and prompt pool leak repair using a vinyl liner patch kit are crucial for protecting your investment and ensuring a safe, clean swimming experience.
Detecting a Leak in Your Vinyl Liner
Before you can apply a vinyl liner patch, you need to confidently locate the source of the leak. A simple “bucket test” can confirm if you have a leak: place a bucket filled with pool water on a step, marking the water level inside and outside the bucket. After 24 hours, if the pool water level has dropped significantly more than the bucket’s water level (accounting for evaporation), you likely have a leak.
Once a leak is confirmed, pinpointing it requires a bit more detective work. Start by inspecting the easy-to-reach areas: around fittings, skimmers, returns, and lights. Look for visual tears or areas where the liner seems to be pulling away. For more elusive leaks, a few drops of dye around suspected areas can reveal the leak as the dye is drawn into the opening. Some even use specialized leak detection equipment, but often, careful visual inspection is sufficient for most smaller liner imperfections.
Choosing the Right Vinyl Liner Patch Kit
Selecting the correct vinyl liner patch kit is the first step towards a successful repair. These kits typically come with a piece of vinyl material and a specialized adhesive. Patches are available in clear vinyl, which blends seamlessly with any liner pattern, or in various common liner patterns to match your existing design.
The adhesive is perhaps the most critical component. Most repair kits feature glue designed for underwater application, eliminating the need to drain your pool. This “wet patch” glue cures underwater, forming a strong, watertight seal. There are also “dry patch” adhesives, which require the pool section to be drained, but these are generally reserved for larger repairs or situations where a wet patch struggles to bond effectively. For most common punctures and tears, an underwater wet patch kit is your go-to solution for convenience and efficiency.
Step-by-Step: Applying Your Vinyl Liner Patch
Successfully applying a vinyl liner patch is a straightforward process when approached systematically.
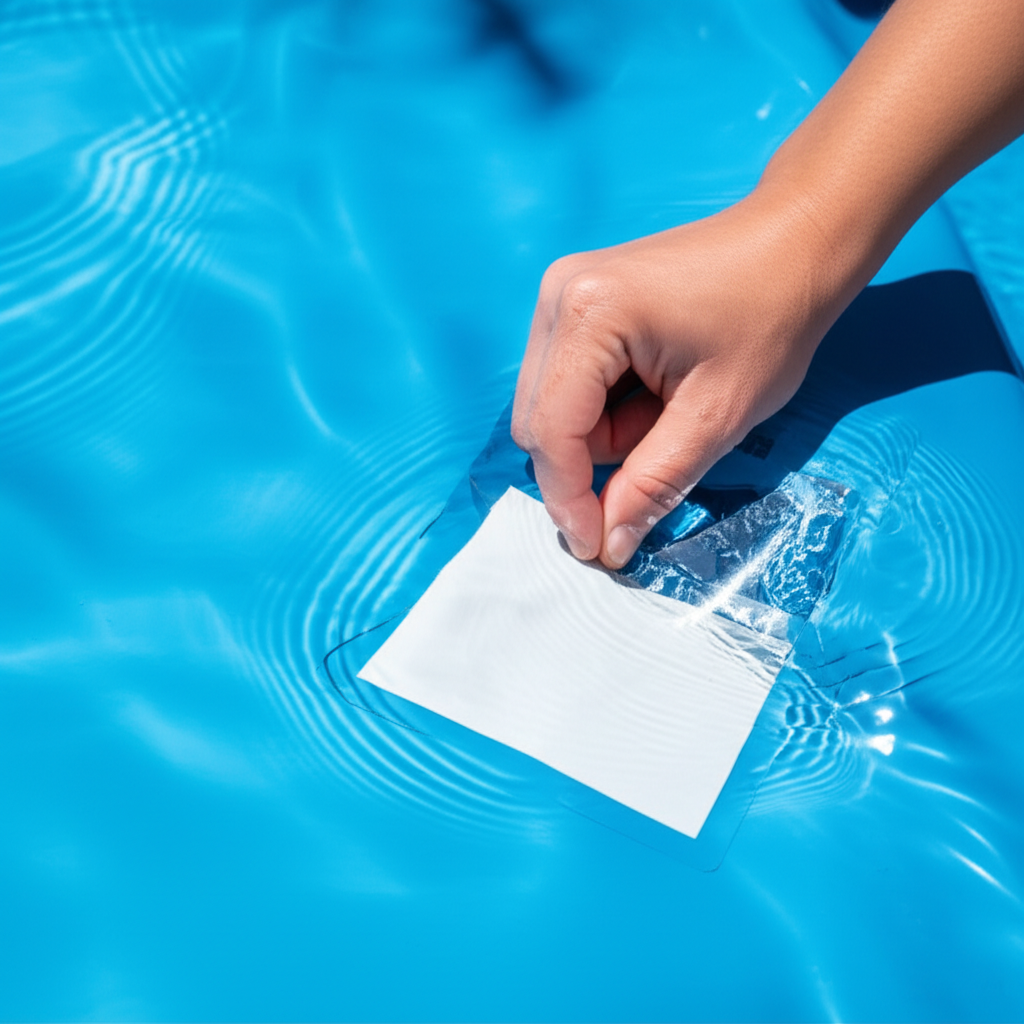
1. Preparation is Key: Once you’ve precisely located the leak, the area around it must be clean. Use a soft brush or sponge to gently remove any algae, dirt, or debris from the liner surface. This ensures optimal adhesion of the patch.
2. Cut the Patch to Size: Using sharp scissors, cut a round or oval patch from the provided vinyl material. It should be large enough to comfortably cover the tear and extend at least one inch beyond all edges of the damage. Rounded corners prevent the patch from peeling up.
3. Apply the Adhesive: Squeeze a generous amount of the specialized underwater adhesive onto the back of the cut patch. Ensure the adhesive covers the entire surface of the patch, especially toward the edges.
4. The Application:
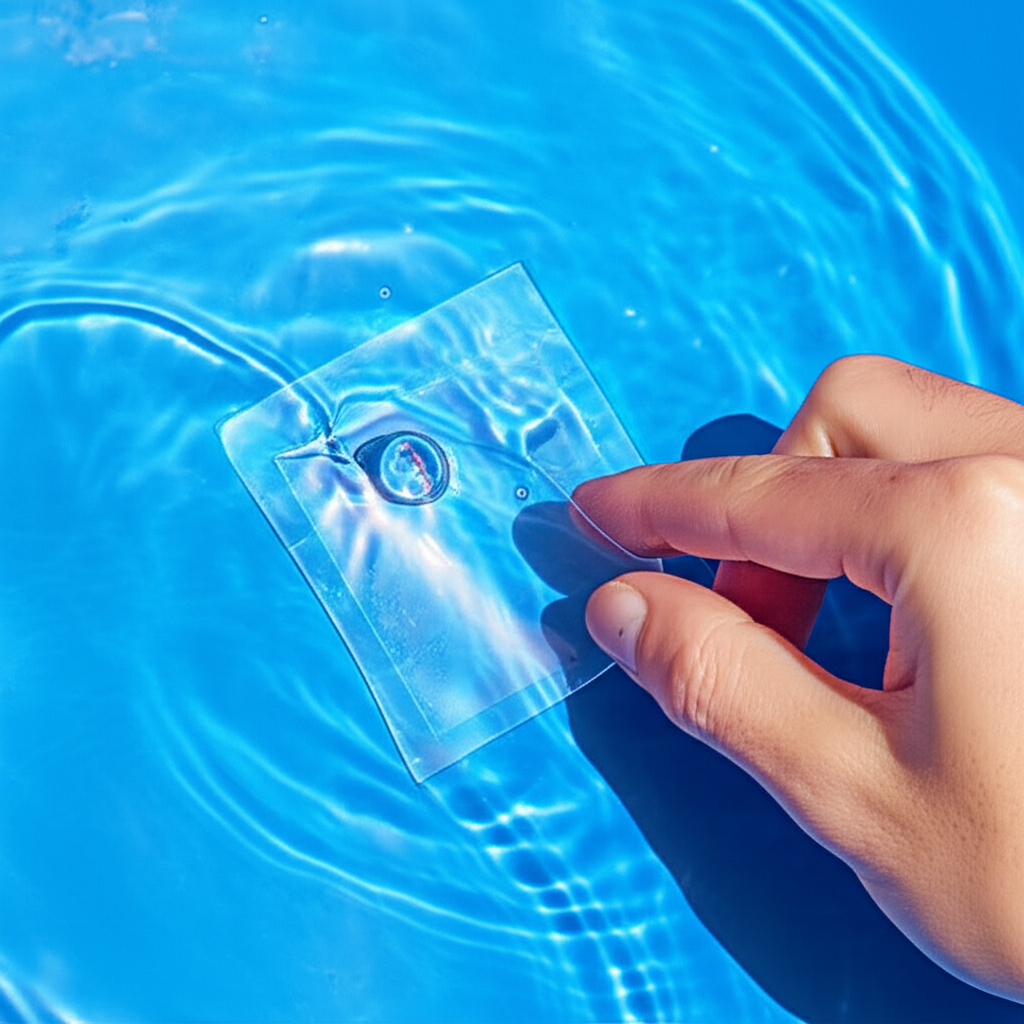
For Underwater (Wet) Patches: Carefully fold the patch in half, bringing the adhesive sides together, to prevent the glue from dissipating too quickly in the water. Submerge the patch, unfold it near the leak, and firmly press it over the damaged area. Use a patching tool or even your hand to smooth out any air bubbles, working from the center outwards. Hold firmly for several minutes to allow the initial bond to set.
For Dry Patches (if pool is drained): Apply the adhesive to the patch and firmly press it onto the clean, dry liner. Use a roller or flat object to apply even pressure and remove air bubbles.
5. Curing Time: Allow the patch to cure for the recommended time, usually 24-48 hours, before scrubbing the area or allowing heavy use of the pool. This allows the adhesive to fully bond and create a long-lasting seal.
Tips for a Durable Pool Leak Repair
To maximize the longevity of your vinyl liner patch, keep these tips in mind:
Don’t Rush: Patience during preparation and application is vital. Rushing can lead to poor adhesion and a failed repair.
Cleanliness Matters: Any dirt, oils, or algae will compromise the glue’s ability to bond. Ensure the repair area is spotless.
Overlap Generously: A patch that extends well beyond the damage provides a more secure seal and reduces the likelihood of future peeling.
Even Pressure: Applying consistent, firm pressure during application helps squeeze out air bubbles and ensures the entire patch surface makes contact with the liner.
Warm Water Helps: While not always necessary, adhesive often cures slightly faster in warmer water conditions.
Professional Assessment for Major Damage: While DIY patching is excellent for small repairs, extensive damage, multiple leaks, or leaks in difficult-to-access areas might warrant a professional repair or even a liner replacement. A professional can also accurately diagnose elusive leaks.
Conclusion
A vinyl liner patch is a truly versatile and user-friendly tool in every pool owner’s arsenal. It empowers you to address common leaks quickly, cost-effectively, and with minimal disruption to your swimming routine. By understanding how to detect leaks, choose the right kit, and apply the patch correctly, you can extend the life of your pool liner, maintain pristine water quality, and ensure countless seasons of enjoyable, worry-free swimming. Regular inspection and prompt action are the keys to catching minor issues before they become major headaches, making a simple patch the ultimate easy solution for maintaining your pool’s health.